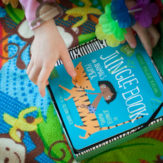
I have been asked so many times by my friends (and lots of readers) about my experience with cloth diapering, and specifically about my experience using the Bum Genius 4.0 Snap Diapers. I created this post when Gigi was about 1 1/2, and have updated it now that we’ve gone through the process twice! So here is a post all about cloth diapering…
.jpg) PIN PIN Why We Use Cloth Diapers: Why We Use Cloth Diapers:
1. Money: From what I researched the average child is diapered about 7,000 times. Disposables cost about 25 cents each. In the end we would have ended up spending close to $2,000 per child on disposable diapers.The Bum Genius 4.0 diapers cost about $17 each when you buy the 24 pack for $400. The comparable cost (at 7,000 uses) makes the cloth diapers 5 cents each and they can be used for multiple children. Even with the added cost of energy and detergent (about $200 a year with a HE washer), it’s still so much lower. That’s $600 vs. $3,000!
*We do always keep current-sized disposables on hand.
2. Environment: I couldn’t stand the thought of throwing away 7,000 disposable diapers over the next two years (and that’s per child). We use environmentally friendly laundry soap and we air dry the diapers.
Other Pros:
-Less leaks: they don’t leak very often (and when they do there’s usually a solvable solution).
-They’re cute: they come in cute colors that make the online shopper in me excited.
-They are easy: once you get a hang of a system they are easy to wash, dry, and stuff.
And Now, The Cons:
-Big and bulky: they are bulky to pack in the diaper bag. I use my large purse a diaper bag and I’m sometimes frustrated with all the space they take up.
-Tricky travel: traveling long distances can be hard. It’s no fun to be dealing with them on a trip. When we can afford it, we buy disposables for traveling.
-They can start holding odor, and they can all start leaking at once and need to be stripped (notes below).
-Poop is gross: you do have to handle these diapers quite a bit more than disposable and sometimes it’s just plain disgusting.
-Sometimes, even with extra washing, they get a funky smell as soon as they are peed in.
Diaper Choice:
For the first two months with both girls, we used the Pampers Newborn Swaddlers. They are amazing. There are newborn cloth diaper options but, for us, the Newborn Swaddlers were the best choice. We did try a couple other newborn brands but found these specific diapers to be the best.
Our personal experience with the Bum Genius 4.0 Pocket Diapers with Snaps has been great. They fit Gigi well and I love the colors. They are also a little less bulky than some of the other brands. That being said, I have friends who use and love the following: Fuzzibunz (great for chunkier babies because they have adjustable leg openings).
Where To Buy – Diaper Junction:
 PIN PIN
I wrote about our experience with Diaper Junction before but I’ll say it again, they are awesome! It’s a small company run by sisters, Robyn and Valerie. Their 30 Day Test Drive program is fantastic. You can try all different kinds of diapers and return the ones that don’t work. We originially tried the Fuzzibunz, Rumparooz, and Bum Genius with Velcro, and Bum Genius with Snaps. We sent back the others and used the store credit to buy all of our Bum Genius Diapers 4.0 with Snaps. They sell gift certificates and have a gift registry. We got a few gift certificates when we were expecting and it was great, when we were ready we had money in our account to buy our diapers. Their customer service is fantastic. They are always available to answer questions or help you troubleshoot a problem. I really have nothing but wonderful things to say about our experience with them.
.jpg) PIN PIN PIN PIN
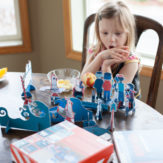
What You Need:
What is a Pocket Diaper:
A Pocket Diaper (like the Bum Genius 4.0) comes with 3 parts: Liner, Insert, Newborn/Secondary Insert. You get all three pieces with every diaper you purchase. We use the main Insert alone most of the time but add the Newborn/Secondary Insert for long naps, car trips, and at bedtime.
PIN
PIN
PIN
A drying rack.
We got this one at Ikea for $20 years ago and we use it for diapers and line dry stuff. It’s lightweight and colapses easily so you can put it away. I also recently purchased a clothes line for our yard and love that too.
A storage spot bin.
We got these Ikea storage boxes for $5 and use them for diapers, toys, and stuffed animals.
Diaper liners.
I made really quickly from scrap flannel but you can also use rectangles of fleece. The fleece doesn’t need to be sewn, just cut it and use it. I would recommend using a colorful fabric! We accidentally toss our white ones out with the wipes. You can also buy them here. You need to use these every time you use diaper rash cream. Since diaper rash cream creates a water barrier it will clog up your cloth diapers and cause them to leak. When Gigi has really bad diaper rash, we find that switching to disposables for a day or two does the trick. Disposables really wick the moisture away from the skin a bit better than the cloth diapers do, but using a flannel or fleece liner should help too. You can buy some diaper creams that are approved for cloth diapers.
Detergents for Cloth Diapers.
You can find a great list of the best detergents for cloth diapers here. We use a homemade soap-free detergent (will share soon) and it works great. Bleach and color safe bleach. (Some diapers cannot be washed with bleach so make sure to check).
Dish Soap.
Helps break up build up on the diapers. (More on stripping diapers below).
Scraper.
I use a hard spatula to scrape the poop into the toilet. People buy sprayers for this too. The spatula works. Then we just toss it in the wash with the diapers.
Dirty Diaper Storage.
We use a little garbage bin with a lid. Another inexpensive Ikea purchase. This one was $15 and comes in lots of colors. I also like using these Planet Wise Dry/Wet Bags which are great for multiple uses. I take them to the pool and toss in the towels, swimsuit and reusable swim diapers.
How Many to Buy:
We bought the 24 pack for $406. I sometime wish we had a few more and will probably order the 3 or 6 pack to add to what we have. The 24 is plenty of diapers but, when I’m really busy, it would be nice to have a couple more.
How to Wash Your Cloth Diapers:
I run a short (express) cold/cold wash. During this wash I use the recommended amount of detergent. For washing cloth diapers the recommended amount is one-half to one-quarter the usual amount. Then I run by a regular length hot/cold wash adding about a tablespoon of color safe bleach. The color safe bleach seems to help lift out the odor and keep them cleaner. I don’t use detergent in the second wash. You want your diapers really clean and free of all soaps when they are done rinsing. Then, we hang them to dry. Bum Genius says you can tumble dry the inserts but I prefer to just line dry it all.
How Often Do You Wash Your Cloth Diapers:
We try to wash them every other day. You don’t want them sitting for long.
What To Do If Your Cloth Diapers Start Leaking:
Run a strip wash (direction below)! Also, if the diapers are too big or too tight they can leak. When she’s inbetween sizes I sometimes find that putting a snug onesie over the diaper helps hold the sides in.
How to Strip Your Cloth Diapers:
If your diapers are leaking, they may have gotten some build up. To strip them, I put them through a regular length hot/cold wash with color safe bleach and a tiny bit (about 1/4 teaspoon) of dishwasher detergent. Then, I remove the liners and run a sanitizing (extra hot) wash on just the inserts with the recommended amount (1/4 cup) of regular bleach. I run a strip-wash on them about once a month or after I’ve had to throw them in the dryer. If they get really clogged (which ours did because I didn’t know about the diaper liners!) you may have to use a dish brush and scrub the liners with lots dish soap by hand to really break it up. Also, pouring boiling water over the inserts and letting them soak helps too.
Never:
-Use diaper rash cream directly in contact with the cloth diaper, always use a liner.
-Boil your diapers.
-Use fabric softeners or dryer sheet with your diapers (or in a dryer that you will be drying your diapers in).
Tips for Removing Odors:
Most cloth diapers do not recommend using vinegar and baking soda! Usually a second hot wash does the trick. The once a month bleaching and sanitizing of the inserts helps a lot. Also, line drying them outside in the sunshine works great. The sun is a natural bleacher.
I really hope this helps answers some of your questions about my experience with cloth diapering. If I missed something you want to know, ask in the comments and I’ll add it to the post! Cloth diapering is relatively easy and I’m really glad we made the choice to do it. I do like keeping a small batch of current size disposables on hand for trips, last minute drives, or extreme diaper rash situations but, 99% of the time we use and love our cloth diapers.
PIN
HAPPY DIAPERING!
BRILLIANT IDEAS…
Thank you all so much for your feedback on the new design. It is such a relief to have it done, and it’s exciting to think ahead with a totally fresh perspective and clean slate, in a sense.
Many things in our house are starting to feel fresh. As you know, I’ve been simplifying and spring-cleaning for what feels like months now! I’m really starting to wonder if this is a forever-ongoing process? The more I pass along to the donation center or friends, the more I want to let go of. But it seems like there’s always more stuff, more drawers, more things; so the process goes on.
One department in which I may have over-simplified things is with my clothes. I had this “brilliant” idea that if I got rid of all my clothes that were old, stained, had holes in them, or that I didn’t love, I would accomplish two amazing things: I would have less laundry to do, and I would really simplify my wardrobe. One thing I didn’t take into account is that almost all of my clothes fit the above criteria for dismissal. I did simplify my wardrobe… simplified it to the point where I have one pair of pajamas, no pants that fit, two tank tops, and have been having to borrow Kyle’s pajamas and sweatshirts. Sadly, I have the same amount of laundry, which Kyle tried to explain would happen unless I changed the amount of clothes I wore (not the amount of clothes I owned). But, as usual, when he tries to challenge my brilliant ideas with logic, I didn’t listen. I now I have to do laundry more often since I run out of clothes to wear mid-week. I hate when he’s right, and he almost always is when it comes to something logical like that. Not that it stops me from executing my less-than-exact ideas. That’s one of the biggest challenges (and sources of humor) in our marriage; we both are stubborn and we both have to see things through our way before we can see through to the other side!
The room I have been putting the most effort into is our master bedroom. Lately I’ve been really needing a quiet, clean place at the end of the day to read, write, or zone out. Kyle has been studying and working around the clock for his final finals, so I’ve been spending a lot of time alone in bed with a book or journal. The more time I spent in our room, the more the clutter was starting to bother me. I hate clutter in general but in bedroom it was particularly frustrating. So I cleaned up the stuffed animals and random children-sized socks from the floor, went throughout my drawers again (I’m a slow learner), put away the mountain of half-clean laundry draped over the chaise lounge, reorganized the Shakespeare plays that G loves to look at and “read”, made a big stack of old fashion magazines to pass along or recycle, washed the sheets and dried them on the line after spritzing them with lavender hydrosol, dusted and wiped down all the surfaces with meyer lemon scented cleaner. By yesterday evening, while not perfectly organized or clean, our room was vastly improved and much cozier. Which, with two little duckies underfoot at all time, felt like a huge accomplishment.
Besides the cleaning and the extra laundry, we’ve been planting, working, and playing the garden. I’ve been doing all the planting; so far we’ve planted radishes, butter head lettuce, romaine lettuce, kale, carrots, candy red onions, shallots, onions, leeks, and peas. Kyle has been taking on most of the work; edging the lawn with the excess of rocks that were dug up from our yard last summer, laying weed-mat, and moving compost. Gigi has been handling the majority of the playing. Lulu has been attempting to eating rocks, dirt, grass, bark, and dandelions. Technically I spend about half by time gardening, and half my time holding Lulu and pulling crap out of her mouth.
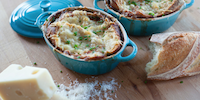
PINPINI have also been cooking a lot and I haven’t relented on my stock-making obsession. I’m aware that as the days get warmer I’ll have to take a break; I imagine that the charm of stock simmering all day long fades as the temperature rises. On these warmer spring days, the stock has been mostly getting turned into simple Posole.
PINIn early June of last year, when Lulu was a newborn, my friend Steph brought us Posole. It was the first time I’d ever had Posole. I don’t know if it was the time of year, the fact that it was a meal I hadn’t made myself, or the fact that everything Steph touches is practically perfect, but it was comforting and delicious and filled some Posole-shaped hole in our lives we hadn’t known existed. Since I’m always roasting chickens and making stock, it was great to have something new to make with the fresh stock and leftover chicken besides my usual range of soups. This time of year is the perfect time to make this soup; it’s cool enough out that you can still roast a chicken, but warm enough that this lighter, brighter version of chicken soup isn’t too overpowering. The Posole soup itself takes no time at all to prepare and the wide range of toppings makes it endlessly entertaining for both the adults and children at the table.
I don’t know how traditional this Posole recipe is since I started making based on Steph’s over-the-phone breakdown of her recipe, but I love it so I’m not concerning myself with tradition. The soup is simple: a yellow onion, salsa verde (either store-bought or homemade depending on your time and energy), corn, hominy, broth, and chicken. The toppings are really what make this soup exceptional. You can use as few or as many of them as you like. I like to use them all, in excess. So, while I like simplicity in my home, I like an over-abundance in my cooking… or at least in my Posole. Happy cooking, and happy Cinco de Mayo.
PIN
POSOLE
Ingredients.
1 medium yellow onion, diced
3/4 cup salsa verde, plus more for topping
1 28oz can hominy, drained and rinsed
1 cup frozen corn, thawed or fresh corn cut from the cob
2 quarts (8 cups) chicken broth
5 cups shredded chicken
extra virgin olive oil
1 shallot, minced
1 avocado, cubed
1/2 bunch cilantro, washed and torn
4 radishes, thinly sliced
green onion, thinly sliced
1 jalapeño, seeded and minced
lime wedges
sour cream
kosher salt
freshly ground black pepper*
tortilla chips
Directions.
Heat 1 tablespoon of olive oil over medium heat, sauté the onion until softened, about 7 minutes. Add in 3/4 cup salsa verde and stir constantly for 5 minutes. Add in the hominy, corn, broth and chicken. Stir it together thoroughly and bring it to a simmer, and cook, uncovered, for 15 minutes. Season to taste with salt and pepper*.
Serve with all the toppings on the side, and a handful of your favorite tortilla chips.
PRINTABLE RECIPE.
POSOLE
Welcome to my new website, and the new home for my blog. This new site is my space to share stories and recipes from my kitchen.
I didn’t transfer all of my old posts over, only the ones that relate to my new focus on food and family; I left quite a few personal posts, and all of my old series behind. I have some new series and features that will be coming soon that I think you’ll love.
I really wanted to create a clean, easy to navigate space where you can find recipes, popular posts, and cooking videos. You can now find all of my archived recipes easily, in one place.
Please, take a minute to look around, and be sure update your subscription (options below) so you continue to get notified about current posts!
Subscribe via EMAIL.
Subscribe via BLOGLOVIN.
Subscribe via RSS.
Thank you for visiting.
With love,
Kacie
HOMESTEADING…
I’ve been dreaming lately, maybe fantasizing is a better description, about living on a farm. I keep envisioning a huge garden, kids running around outside, lots of chickens, a few goats, and (Kyle thinks I’m insane) a pig, a donkey, and a sheep (all of the “micro” variety). If you’ve never searched the Web for images of “baby doll sheep”, it’s a good use of your time. If you’re really looking to procrastinate search for “micro piglets” and “miniature donkey” as well. I just got enthusiastic and searched for other miniature farm breeds and discovered miniature cattle!!! I am getting a bit off track…
Beyond the animals, I am picturing simplicity in the form of sheets drying on a clothesline, sitting on the porch shelling peas, reading books, scraped knees, maybe even a little art studio. When things in life get stressful, this is where my mind wanders. In fact I sort of meditate myself to sleep at night by picturing a quiet, white, bedroom; sheets slightly crisp from drying on the line, and smelling wonderfully fresh. I used to visualize Parisian cafés and an apartment in the City of Lights, but now I can’t see anything other than a little farm life. Not that I’d turn down a Parisian apartment, or a house in the French countryside for that matter.
My Nana had a farm where we used to go spend a few weeks every year. For a time in the summer all the grandkids descend on Nana’s farm and we would spend part of our summer vacation catching Garter Snakes (admittedly, I never participated in this particular activity. I stick with things that have between 2 and 4 legs. Three legged dogs are just fine.), admiring and feeding her horses and her donkey, helping her with chores, making apple sauce, driving her crazy, and climbing rafters in the barn and jumping into the owl-pellet filled hay piles (we didn’t tell her about this until we were much older).
PINThis photo is of me from July, 1990 on Nana’s farm. There’s a pretty large part of me that wants to rediscover that flower crown-making, rainbow sandal-wearing self…
While relocating to a farm life isn’t in our immediate future, I hope that someday we can make it a reality. In the meantime, I’m doing things around our home to help create the kind of environment I’m dreaming about. Since I’ve been hit with the homesteading bug, I’ve been focusing my energy on creating things from scratch. As I mentioned last week I made my own deodorant, and elderberry syrup. This week I made my own laundry detergent, cloth diaper detergent, dishwasher soap, and reusable baby wipes. When we run out of our current lotions and certain beauty products I have half a mind to try making those too. I’ve also been making things like mayonnaise when we can get farm fresh eggs, and I have plans to try my hand at making my own ketchup, mustard, crème frîache, ricotta, and yogurt. I already make Lulu’s baby food, most of the stock we use, and almost all of the meals in our house are created from scratch. As I figure things out and learn what works best I will share all of these directions and recipes!
We’re getting geared up to plant the garden this weekend, and I ordered a clothesline and pins this week. We’ve been spending as much time as possible outside; which becomes more and more enjoyable as we continue working on our backyard. So while farm dreams have to wait, homesteading has begun in full force. As a work-from-home, full-time, very-much-on-a-budget mom who has a high need to constantly create and cook, these activities satisfy me in every way. In addition to getting more hands on with the little things, I’ve also been “unplugging” more, reading more, laying in the grass with the kids and looking at the clouds more. Well, let’s be honest. Gigi and lay on the grass and look at the clouds; Lulu eats the grass.
PINWhile relocating to a farm life isn’t in our immediate future, I hope that someday we can make it a reality. In the meantime, I’m doing things around our home to help create the kind of environment I’m dreaming about. Since I’ve been hit with the homesteading bug, I’ve been focusing my energy on creating things from scratch. As I mentioned last week I made my own deodorant, and elderberry syrup. This week I made my own laundry detergent, cloth diaper detergent, dishwasher soap, and reusable baby wipes! When we run out of our current lotions and certain beauty products I have half a mind to try making those too. I’ve also been making things like mayonnaise when we can get farm fresh eggs and I have plans to try my hand at making my own ketchup, mustard, creme friache, ricotta, and yogurt. I already make Lulu’s baby food, most of the stock we use, and almost all of the meals in our house are created from scratch. As I figure things out and learn what works best I will share all of these directions and recipes!
We’re getting geared up to plant the garden this weekend, and I ordered a clothesline and pins this week. We’ve been spending as much time as possible outside; which becomes more and more enjoyable as we continue working on our backyard. So while farm dreams have to wait, homesteading has begun in full force. As a work-from-home, full-time, very-much-on-a-budget mom who has a high need to constantly create and cook, these activities satisfy me in every way.
Now, as promised, here is my Roasted Potato recipe. I always cook it alongside my Roasted Chicken, the recipe for which I shared last week. You can certainly make these potatoes on their own but part of the key to their delicious flavor comes from the drippings of the Roasted Chicken and the garlic that roasts with the chicken. (I’ll add some adapting notes in case you plan to just make the potatoes on their own).
PINROASTED POTATOES
WITH LEMON, ROSEMARY AND GARLIC
ROASTED POTATOES (cooked along with a Roasted Chicken):
Ingredients.
4 lb new potatoes, scrubbed and cut into 1” pieces
kosher salt
freshly ground black pepper
1 large sprig rosemary
1/2 lemon, sliced into 1/4” rounds
Directions.
Fill a large pot with cold water, add the potatoes. Bring the water to a boil and par-boil the potatoes for 5 minutes. Drain the potatoes and return them to the pot. Hold a lid tightly on the pot and shake the potatoes about until the get very slightly bashed up around the corners and edges.
Preheat the oven to 450˚F.
Transfer the potatoes to a large roasting pan, add the lemon slices, and the sprig of rosemary. Season with 1 teaspoon of kosher salt, and some freshly ground black pepper. Drizzle 3/4 olive oil over the potatoes, and toss everything together.
Cover the potatoes tightly with aluminum foil, and roast in the oven with the chicken, for 30 minutes. Remove the foil, toss the potatoes about, and roast for an addition 30 minutes. At this point you will be basting your chicken, using the baster or a large spoon, transfer about a half cup of the chicken drippings to the potatoes and toss around. Put the chicken and potatoes back in the oven for another 30 minutes.
At this point (after half hour roasting covered, and an hour roasting uncovered) the chicken will most likely be done roasting. Add about a quarter cup of the drippings to the potatoes, along with the roasted garlic cloves, toss and put the potatoes back in the oven for about 10 minutes; until the stock is absorbed and the potatoes are nice and browned and crisp. (If the chicken isn’t done put it back in the oven along with the potatoes until it’s done).
Discard the rosemary sprig and the lemon rinds. Enjoy with your chicken!
ROASTED POTATOES (cooked alone):
Ingredients.
4 lb new potatoes, scrubbed and cut into 1” pieces
kosher salt
freshly ground black pepper
1 sprig rosemary
1/2 lemon, sliced into 1/4” rounds
1 head of garlic, cloves separated, peels on
1/2 cup chicken stock
Directions.
Fill a large pot with cold water, add the potatoes. Bring the water to a boil and par-boil the potatoes for 5 minutes. Drain the potatoes and return them to the pot. Hold a lid tightly on the pot and shake the potatoes about until the get very slightly bashed up around the corners and edges.
Preheat the oven to 425˚F.
Transfer the potatoes to a large roasting pan, add the lemon slices, and the sprig of rosemary. Season with 1 teaspoon of kosher salt, and some freshly ground black pepper. Drizzle 3/4 olive oil over the potatoes, and toss everything together.
Cover the potatoes tightly with aluminum foil, and roast in the oven for 30 minutes. Remove the foil, toss the potatoes about, and roast for an addition 30 minutes. Add half a cup of the chicken stock and the garlic cloves to the potatoes and toss around. Put the potatoes back in the oven for another 30 minutes.
Add a quarter cup of chicken stock to the potatoes, toss and put the potatoes back in the oven for about 10 minutes; until the stock is absorbed and the potatoes are nice and browned and crisp.
Discard the rosemary sprig and the lemon rinds. Gently peel the garlic cloves and add the roasted garlic back to the potatoes. Toss everything together. Enjoy!
PIN
PRINTABLE RECIPE.
ROASTED POTATOES WITH LEMON, ROSEMARY AND GARLIC
THAT DAMN JELLY BEAN…
Yesterday was one of those strange days where for everything that went perfectly, something was totally off… but in the end it was a really lovely day. We woke up early, a habit picked up when we were all sharing a room in Mexico for vacation last week! Did I mention we were going to Mexico? Well, we did and it was really lovely. My in-laws took us all (our family and Kyle’s brother’s family) to their time-share spot in Cabo. We went once before, when Gigi was only two months old. It sure was nice to get away and we came back to bursting tulips and 70 degree weather!
Lulu has a nasty cold, probably something she picked up by licking the airplane seats on the way home from Mexico, and sounds like a cranky frog. Despite her bug I had big plans for the day to get up to the local nursery and look at some different varieties of “stepables” to plant between our pavers on our patio, and to pick up a local planting guide so we can start planning and planting! So after Lu’s croaky morning nap, we stepped out to run our errands. We headed straight to the garden store, which is bright and open and was full of people buzzing with spring-fever. It felt so wonderful to soak in the late morning sun, smell the lavender, run our fingers over the crawling thyme, and eye the perfect rows and rows of Ranunculus.
PIN
Towards the end of our time at the garden store, Gigi was not being a great listener. I should have quit while I was ahead but I needed a few items from the grocery store, so I ignored my mothers’ intuition and we headed in. After all, we only needed six little things!
I was not all that surprised when Gigi had a major meltdown in the middle of the produce department. It all started when she stole a jelly bean from the candy bin. Why, one might ask, is there a big candy bin in the middle of the produce department? Anyway, we had a bit of a showdown that went a little something like this, “G, do not pick up that candy. Do not put that jelly bean in your mouth. Spit that jelly bean out right now! You are not choosing to be a good listener.” She said nothing, but when I finally pried that damn jelly bean out of her mouth she started wailing, “I want GRANDMA!!!!!!”, over and over again. I suspect G was suffering from a case of The Grandparent Withdrawals; I’m sure you know the symptoms. I plunked her in the cart, dashed away from the produce department over to the far end of the store while she cried and kid kicked my leeks, and grabbed the last couple items I needed before fleeing the store. I’m sure I was quite a sight carrying Lulu on my left hip, and Gigi around her middle with my right arm, crying and legs flailing, with the grocery gal following behind with my bag of bruised produce.
Once the girls were buckled in their carseats, I headed to the coffee shop, popped in for a couple of lattes (one for me and one for my sweet friend who just welcomed her third baby!), drove to her house and dropped off her caffeine (while G fumed in the car). I got a quick look at her beautiful new, fresh baby, and despite having a very snotty baby and very frustrated kid in my car, I felt a wave of desire. There’s just something about a teeny tiny newborn, sleeping with their delicate little arms up over their head, that makes me think crazy things. Once we were home, G said, “I need a naaaaaaaaaaaaaap!” Agreed.
I got the girls in bed as quickly as possible and started making dinner even though it was only 1pm. I just felt the desire to cook and prep, and zone out while I peeled garlic for a while. I didn’t even bother using a fast-peeling method, I didn’t even whack the cloves with my knife; I just did it, one clove at a time, tediously removing each little sticky strand of skin from the cloves while the breeze knocked around the curtains and the house was silent. I trimmed my herbs, scrubbed my chicken, juiced my lemons, in complete, blissful silence. By the time my chicken was prepped and in the fridge, I’d found that my heart rate had returned to normal and I was thinking back on how “funny” our little produce-section scene must have been to witness. It was, after all, a classic toddler-mom standoff… over a stupid jelly bean. If there’s one thing you need while raising a toddler, it’s a sense of humor… well, that and a good recipe for Roasted Chicken that takes just long enough to prep that you can regain said sense of humor after a trying morning.
I make my Roasted Chicken with Herbs, Garlic, and Lemon about every other week. It’s best when prepped around 1pm, so the lemon juice has time to tenderize and marinate the meat a bit. Doing the prep earlier in the day also makes dinner time feel like a breeze, and you end up with a crisp-skinned, tender, flavorful, comforting, chicken dinner. I almost always accompany the chicken with a side of crispy oven roasted potatoes (for which I’ll share the recipe next week), and a fresh salad. It’s one of our staple dinners, and it’s a dinner that fuels a few days’ worth of meals. I have stock simmering on the stovetop now to make Posole for dinner tonight, and tomorrow I’ll use a bit of the shredded chicken to make a spinach salad with and bruised veggies and a homemade dressing.
There is something pretty satisfying, and relaxing, about stretching one meal into three or four; about feeding a family of four for a few days from one main source. Plus, the homemade chicken stock should help us fight back against this spring cold (along with the homemade Elderberry Syrup I made last night)! I also made deodorant yesterday (please, please tell me if it’s not working, okay?). We’re talking serious homesteading over here! It just so happens I have some things to tell you about in regards to “homesteading” but it will have to wait for another day… maybe next week when I share the potato recipe with you. Potatoes and pioneering seem like a good match up.
In the meantime, here is my recipe for Roasted Chicken with Herbs, Garlic, and Lemon.
PIN
PIN
ROASTED CHICKEN
WITH HERBS, GARLIC AND LEMON
Ingredients
1 whole chicken
juice of 3-4 lemons
1 lemon, sliced
large handful of fresh herbs, thyme, rosemary, parsley (whatever you have on hand)
1 head of garlic cloves, peeled
extra virgin olive oil
kosher salt
freshly ground black pepper
Directions.
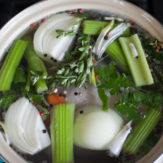
Clean the chicken, inside and out, by scrubbing it with a good amount of kosher salt. Rinse it under cold water, and pat it dry with paper towels. Using a pair of poultry or kitchen shears, cut out the backbone. Set the backbone aside for making stock, or discard.
In the bottom of a roasting pan or casserole dish, place a pile of herbs and fan out one lemons’ worth of lemon slices. Place the chicken, breast side up, over the herbs and lemon slices. Toss the peeled garlic cloves into the pan between the drumstick (you want them exposed, not tucked under the bird).
Pour the lemon juice slowly over the chicken, drizzle it with a good amount of olive oil (I use about 1/3 cup). Season the chicken and the garlic cloves generously with salt and pepper.
Cover the chicken tightly with aluminum foil and pop it in the fridge for a few hours… it doesn’t have to sit and marinate but it’s great if possible.
When you’re ready to cook the chicken, take it out of the fridge and preheat your oven to 450˚F. When the oven is heated, place the covered chicken in and roast for 30 minutes. After the first 30 minutes, remove the foil, baste the chicken with the juices in the pan, and return it to the oven for another 30 minutes. Then, baste it one last time and check the temperature. The size of the chicken you have will vary this final cooking time… generally a 5lb. chicken will take another 30 minutes or so.
I pull my chicken from the oven with the breast temperature is 170˚F. Be sure to let the chicken rest for ten minutes or so before carving it up. Serve it along with the roasted garlic cloves, or my crispy oven roasted potatoes (which use the garlic cloves from the chicken)!
PRINTABLE RECIPE.
ROASTED CHICKEN
|


.png)


Earth's Best Special Delivery - Diapers and Wipes - WITH LOVE - […] you know, I am a big supporter of cloth diapering, but I always have current-size disposables on hand, and we only use disposables at night. It’s […]