Masthead header

This summer was our first time pickling. I was a little overwhelmed at first, even though it seems pretty basic. The easiest time to pickle was when the girls were in bed for the night… and all I wanted to do when they were in bed was lay very, very still on the couch and stare off into space. Staring off into space actually sounded kind of taxing, so you can imagine how daunting it would seem to have to slice, assemble spices, measure things, figure out ratios… and that’s all after cleaning off the kitchen counters! But, Kyle was motivated enough for the two of us. So, we began our adventures in pickling (some of us more enthusiastic than others).

When we are pickling the whole house fills with a sharp, almost astringent, vinegar smell that up until this summer would have bothered me. My aversion to vinegar is something I’ve worked hard to overcome, the aversion itself stems from a long ago game of Truth or Dare during which my sister dared me to drink vinegar into which she had emptied half of the spice cabinet. But in the past years I’ve finally begun to enjoy delicacies like Salt and Vinegar Potato Chips and pickled products. There’s something wonderful about pickling things yourself… it’s different from most of the type of cooking I do and the process is incredibly fun! Plus the result, rows of beautifully colored pickled veggies, is very rewarding.

We are months away from those hot midsummer days when Kyle somehow convinced me to participate in our first pickling projects and I have found myself wanting to pickle something. The best things we made so far include Dilly Beans, Chile Dilly Beans, Bread and Butter Pickles, Pickled Beets, and my favorite of the bunch, Spiced Pickled Carrots! It’s the best when everything grows in your own garden but this time of year our garden looks very, very bare… bare except for the kale that is frozen solid at the far end of the middle bed. So a couple weekends ago Kyle went to the store and bought all of the ingredients to make a big, huge batch of Spiced Pickled Carrots. I peeled and chopped while he made the brine and measured the pickling spice, garlic and chiles into the pint jars. We spent a whole Sunday morning pickling carrots and now that that’s done I can’t wait to do more beets! I have a feeling next year our entire garden is going to be heading for jars!

pickled carrots pickling basicsPINpickled carrots pickling basicsPINpickled carrots pickling basicsPIN

The Spiced Pickled Carrot recipe we use is from this book: The Pickled Pantry! Let me know if you’re interested and I’ll give you the whole list of everything we purchased to get started! It’s surprisingly inexpensive!

Share to:FacebookTwitterPinterestEmailLink

A DEPARTURE AND A SURPRISE…

Last week we started Lulu on solid food. While I felt really excited to begin this journey with her, I felt a little sad about it. She is growing so quickly and I feel like the start of solid food is the first real departure from it being just us two. Despite the challenges, I love breastfeeding, and I will defend my first six months of exclusive breastfeeding (to a fault) against anyone who recommends supplementing with formula (including my husband and our pediatrician). I struggled with milk supply issues, particularly between month 4-5, and I drove myself crazy with fenugreek and the breast pump. I told myself I’d just supplement this time around if I needed to, since I had the same experience when Gigi was a newborn, but when the time came I just couldn’t do it. It may seem silly but I so treasure those first six months. I love knowing that I created this little person and that I’m sustaining her. And, if I’m being totally honest, it makes me feel like she’s all mine, and I love that.

Guide Introducing Solid Foods to Your Baby and RecipesPIN

When the time came, starting her on solid foods was fun, and Lulu loved it. I didn’t feel as emotional about it as I thought I would. It was a family affair with Kyle taking photos, and even Gigi got involved, helping to feed her with a spoon. So we are officially on our way to introducing Lulu to the wonderful world of food. For my part, I spent the day yesterday whipping up a number of purées to freeze. One of the many reasons I love cooking is the way it helps me process my complex emotions.


One thing that has completely surprised me about this new step for Lulu is the way it’s effected Gigi. It’s strange but as soon as she started to eat solid food something changed between the girls. There has been a palpable shift in the way Gigi sees her baby sister. It’s like having her sit at the table with us for breakfast and lunch made her realize the playmate potential. While Lulu sits in her high chair G takes great pleasure playing peek-a-boo with her, and she’s started saying things like, “When we are done eating can she come play with me?” and she loves to have Lulu’s highchair as close to her chair as possible. It’s been really wonderful because up until now G has sort of just accepted that she has a little sister but hasn’t really wanted to be too physically involved with her. She likes to make her smile and laugh, she loves when she “talks”, but she has been really sensitive about being touched by her. When Lulu’s leg bumps her she gets frustrated, and she’s never wanted to hold her. But suddenly that has all changed.

This new relationship has transferred away from the table. Gigi has been sharing her toys with Lu, requesting her presence in the bathtub, and telling her stories. The other evening, out of nowhere, Gigi asked if she could feed Lulu her 4pm bottle. YES! I positioned her on the couch with Lulu all propped up on pillows and let the two of them figure it out. Lu has not been the easiest bottle babe, in fact she still doesn’t like to take more than 1 measly ounce, unless I’m the one wielding the bottle. But she happily took quite a bit from Gigi. One of the most wonderful things about nursing or bottle feeding Lulu is that she waves her little hand all around until she finds yours to hold. She got a good grasp on Gigi’s and I half expected G to get frustrated but she just started laughing. This whole scenario lasted no more than six minutes but it made my heart burst with happiness.

big sister and baby sisterPINbig sister and baby sisterPINbig sister and baby sisterPIN


Share to:FacebookTwitterPinterestEmailLink

This Roasted Butternut Squash Soup is really delicious! It’s one of my fall and winter go-to meals. It also freezes well and makes a great baby food! I’ve also separated out the sections, and included videos for how to make brown butter and how to make fried sage!


ROASTED BUTTERNUT SQUASH SOUP WITH BROWN BUTTER AND FRIED SAGE

Ingredients.
2.5lbs butternut squash, peeled, seeded and cubed
extra virgin olive oil
1 head garlic
kosher salt
freshly ground black pepper
nutmeg
1 yellow onion, diced
1 large carrot, peeled and chopped
5 fresh sage leaves (plus more for garnishing)
2 quarts low-sodium vegetable broth
unsalted butter

Directions.
Preheat the oven to 400°F. Slice of the top 1/3 of your head of garlic, exposing the tops of the cloves. Place the head (exposed cloves up) on a square of aluminum foil. Pour a few tablespoons of olive oil over the head, sprinkle with a pinch of salt and pepper. Seal the head in the foil pouch and set it in the corner of a large cookie sheet.

In a large bowl combine the cubed squash, 1/4 cup olive oil, 1 tsp of salt, 1/2 tsp of freshly ground black pepper and a pinch of nutmeg. Toss until the squash is well coated in oil. Transfer to the cookie sheet and spread into a single layer. Place the cookie sheet in the oven and roast the squash and garlic, tossing the squash occasionally until the squash is caramelized. Remove the garlic at 1 hour, open the foil and check that it’s nice and golden. Let it cool, or if needed return it to the oven for a few more minutes. The squash usually takes 1-1 1/2 hours. When the squash is caramelized remove the baking sheet from the oven and allow it to cool. Remove the roasted cloves of garlic from the head and set aside in a small bowl.

Meanwhile, heat a few tablespoons of olive oil in a large stockpot over medium high heat. Toss in the onion and carrot, season with a pinch of salt and pepper, and sauté for 5-7 minutes until soft. Toss in five chopped sage leaves and stir for 1-2 minutes, until fragrant. Pour in the vegetable broth, the roasted squash, and the roasted garlic cloves. Bring to a simmer and cook for about 20 minutes.

While the soup is simmering you can prepare the brown butter. Take 1/2 stick of butter and in a small sauté pan, over medium-low heat, gently melt the butter, stirring constantly. It will begin to foam. Continue stirring. The foam will subside leaving you with separated butter. It will look perfectly clear. Continue to stir. The butter will begin to foam up again and will quickly begin to turn a toasty brown color. When it smells amazing and turns a beautiful golden brown hue, quickly transfer the butter to small bowl and set aside.

Wipe the pan clean with a damp paper towel. Pour in 1/4 cup extra virgin olive oil and heat until shimmering. Gently place in a few leaves at a time and allow to fry for 10-15 seconds. You don’t want them to brown! Remove using tongs and set on a paper towel to drain. Repeat with the remaining garnish leaves. Sprinkle with a pinch of salt and set aside.

By now your soup should be ready to blend. Using an immersion blender purée the soup until smooth. If you don’t have an immersion blender, transfer the soup in batches to blender and purée until smooth. Leave the plug off, covering the whole on the top with a thickly folded towel. This allows some of the steam to escape so you’re not created any pressure.

Finally, transfer the soup to large bowls, top with a drizzle of brown butter and a few fried sage leaves. Serve immediately with a crunchy slice of toast.

PRINTABLE RECIPE.
ROASTED BUTTERNUT SQUASH SOUP

Roasted Butternut Squash with Brown Butter and Fried Sage RecipePIN

Share to:FacebookTwitterPinterestEmailLink

AFTER THANKSGIVING…

We had a really wonderful Thanksgiving. Kyle took Wednesday and today off so we have had lot of family time. We spent part of the earlier week with his family, and the latter half of this week with my family. We spent Wednesday night and Thanksgiving night up at my Dad and Stepmom’s little ranch with lots of friends and family. We get pretty spoiled for the big day, with talented chefs cooking up wonderful dishes, our wonderful friend from Portland brings the most amazing cheeses and treats and incredible champagne. I brought my Sourdough Stuffing, and Salted Caramel Cheesecakes. My Stepmom is a fabulous hostess, the table is arranged beautifully with thoughtful, funny gifts laid out for everyone and there’s a focus on gratitude, conversation, and fun. It’s quickly becoming one of my favorite holidays.

If you’ve hosted your own Thanksgiving and are lucky enough to be in possession of a leftover turkey, you can make this simple and incredibly comforting Turkey Barley Soup. The first step is to make a rich, flavorful broth from what remains of your Thanksgiving turkey. The soup is the perfect remedy for the long cold evenings between the holidays. Cozy up next your Christmas tree with a bowl of this soup and a chunk of crusty french bread.

Turkey Barley Soup RecipePINTurkey Barley Soup RecipePIN

TURKEY BARLEY SOUP

Ingredients.
2 tablespoons extra virgin olive oil
1 large yellow onion, chopped
2 carrots, peeled and sliced
4 cups shredded turkey meat
1 cup barley
8 cups turkey broth*
2 garlic cloves, minced
1 teaspoon garlic powder
1 teaspoon onion powder
1/2 teaspoon dried parsley
1 bay leaf
pinch nutmeg
kosher salt
freshly ground black pepper

Directions.
In a large pot, heat the olive oil over medium high heat. Sauté the onion until softened, about 7 minutes. Add the carrots and celery and sauté for another few minutes. Toss in the garlic, spices and bay leaf and stir together for a minute or two.

Add in the broth, turkey, and barley. Stir together to combine and simmer, uncovered, for 35-45 minutes, until the barley is cooked through but still has a little chew and the broth is slightly thickened and bubbling. Season to taste.

Serve and enjoy.

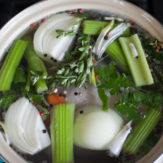
*I make my turkey broth by cutting and breaking up my turkey carcass into smaller parts, submerging those parts in cold water in large stock pots, adding a bay leaf or two, a couple sliced carrots, celery and onions, peppercorns and a bit of thyme and rosemary. I simmer them on very low heat, partially covered for a few hours until the broth is super flavorful and slightly thickened. I strain it, and allow it to cool. Strip all the meat from the bones and set it aside to use for the soup. Scrape the fat from the top of the cooled broth and discard it. You should have a wonderfully flavorful and gelatinous broth!

PRINTABLE RECIPE.
TURKEY BARLEY SOUP

Share to:FacebookTwitterPinterestEmailLink

When I was a little, we spent every Christmas Day at my Grandma and Grandpa’s house. My Grandparents’ house was always warm and cozy, and always smelled slightly smokey due to the firelplace and woodfire stove. The house seemed huge to me, the Christmas tree was always over-lit with hundreds of white lights. My Grandma made Christmas elegant; she was an elegant lady. Their little kitchen island always boasted an array of snacks and treats… Almond Roca, my Grandma’s caramels, cookies from Grandpa’s favorite bakery. Come to think of it, I’m sure there were savory snacks as well but I inherited my Grandpa’s sweet tooth so I only had eyes for things dusted with powdered sugar.

There was always a nice Christmas dinner, usually consisting of a roast (expect for when I was a vegetarian and my well-intentioned Grandma made a ham, “Honey, I know you don’t eat meat so I made you a ham.”), a green salad with Grandma’s ketchup-and-vinegar dressing, and various classic sides. Dinner was lovely but I couldn’t wait for dessert, more specifically for Grandpa’s “famous” apple pie.

Grandpa’s pie was tart and sweet, with apples sliced so thinly they practically melted in your mouth. Their oven was old, electric, and very small, and the bottom of his pies were always coated with a thin crust of caramel, something I haven’t been able to replicate despite years of trying. His crust is rolled so thin you can see through it, using only one pie crust recipe for two pies. My Grandpa just turned 92 and he still sends me recipes, and we talk about all things baking: crusts, pies, tarts… he is my favorite resource.

When I was a teenager, I called him and asked him if he would teach me how to make his spectacular pies. He obliged and we spent a day in the kitchen together. Everything my Grandpa does is done with precision. He was methodical and specific. He peeled the apples with a small paring knife, the slices were 2mm thick, the flour sifted perfectly. His pies were not glamorous, the tops were often patched up, with perfunctory vents. He used a fork to crimp the edges, then rolled the sides in to prevent the juices from making a mess in the oven. Practicality trumps beauty in his book… which is ironic since my Grandma was just the opposite.

I remember thinking that I would never be able to make them quite as good as he does, and I think that’s true, but I love making them nonetheless. I love this time of year when I can go to the store and load up on apples, and set about baking pies. Gigi is now old enough to (kind of) help me make them. We recently pulled on our aprons and got down to business making Great Grandpa’s Apple Pies. It means so much to me to be making them with Gigi, even if she’s mostly just making a mess.

great grandpaPINgreat grandpaPINgreat grandpaPINgreat grandpaPINgreat grandpaPINgreat grandpaPINgreat grandpaPIN

GREAT GRANDPA’S APPLE PIE

Ingredients for Pie Crust.
1 1/3 cup cake flour
1 cup all-purpose flour, plus more for rolling surface
1 stick very cold butter, cut into slices
1 tsp fine salt
ice water

Ingredients for Pie Filling.
3 1/2 lbs Granny Smith Apples, once peeled and cored you should have about 2lbs
1 -1 1/3 cup sugar, depending on tartness of apples
1/4 cup lemon juice, freshly squeezed
1 tsp ground nutmeg
1-2 tsp ground cinnamon, depending on how much spice you prefer
1 tbsp butter
2 tbsp all-purpose flour
1 tbsp milk

Directions.
First, peel and core the apples, then set them aside in a large bowl of water to keep them from browning.

To make the crust, place the cake flour, all-purpose flour, and salt in a food processor. Pulse to combine. Scatter in the slices of butter, then pulse again until the butter is well combined. Slowly, with the food processor running, drizzle in the ice water. You want to take your time adding a little water at a time until the dough just forms a ball. Transfer the dough to a ziploc bag and set in the fridge while you slice the apples.

Drain the water from the bowl holding the apples. Using a 2mm or 4mm blade (the standard size that comes with most food processors is 4mm) slice all of the apples, in batches if necessary. Return the apples to the large bowl, toss with the lemon juice.

Preheat your oven to 450º F.

Sprinkle 1 teaspoon of sugar into the bottom of your pie dish. Remove your dough from the fridge. Separate 1/3 of the dough and put it back in the bag, and set aside. Working with 2/3 of the dough, roll it into a ball, on a well floured surface, roll out the dough until it will fit your pie pan, or it reaches your desired thickness. I prefer mine really thin. Transfer the bottom crust to your pie dish. Use a fork to poke a few holes in the bottom pie crust.

Start assembling your pie filling by evenly distributing the following in layers:
2/3 cup sugar
1/3 of the nutmeg and cinnamon
sift
1 tbsp flour to cover the cinnamon
1/2 of the sliced apples, take your time and pack them in as tightly as you can
1/3 cup sugar
1/3 of the nutmeg and cinnamon
sift 1 tbsp flour to cover the cinnamon
the rest of the apples
the rest of the nutmeg and cinnamon
dot with 1 tbsp butter

Form the remaining 1/3 of your pie dough into a ball. Working on a floured surface, roll out the top crust.

Using your fingertip, dab milk around the outside rim of the bottom pie crust before transferring the top crust to the pie. Press to seal the edges, trim the excess crust, and use a fork or crimp to finish the edges.

Use a sharp knife to cut vents in the top crust, creating whatever kid of design you like.

Place the pie on a baking sheet bake in the center of the oven at 450ºF for 15 mins, reduce heat to 350ºF for another 25-35mins, until the apples have no resistance when a skewer is inserted through one of the air vents.

Transfer the pie to a wire rack, allow it to cool for 1 hour before serving it with vanilla ice cream, or fresh whipped cream.

PRINTABLE RECIPE.
GREAT GRANDPA’S APPLE PIE

Share to:FacebookTwitterPinterestEmailLink